Climbing Photography Tips: Mastering the Art of Climbing Photography
Climbing photography is a unique and challenging genre of photography that requires a combination of technical skill and creativity. Whether you’re a professional photographer or an amateur looking to improve your skills, mastering the art of climbing photography requires a deep understanding of the specific challenges and opportunities that come with shooting climbers and their climbs.
In this article, we’ll explore a range of climbing photography tips and techniques that will help you capture stunning climbing photos that truly capture the essence of the sport.
Camera equipment and settings
One of the most important aspects of climbing photography is having the right camera equipment and knowing how to properly adjust your settings. While many cameras can be used for climbing photography, certain types of cameras and lenses are better suited to the task. For example, a DSLR or mirrorless camera with a wide-angle lens is a great choice for capturing the entire climbing scene.
Additionally, it is important to understand how to adjust your shutter speed, aperture, and ISO settings to achieve the best results. A slow shutter speed will help capture the movement of the climber while a fast shutter speed will freeze the action.
Composing the shot
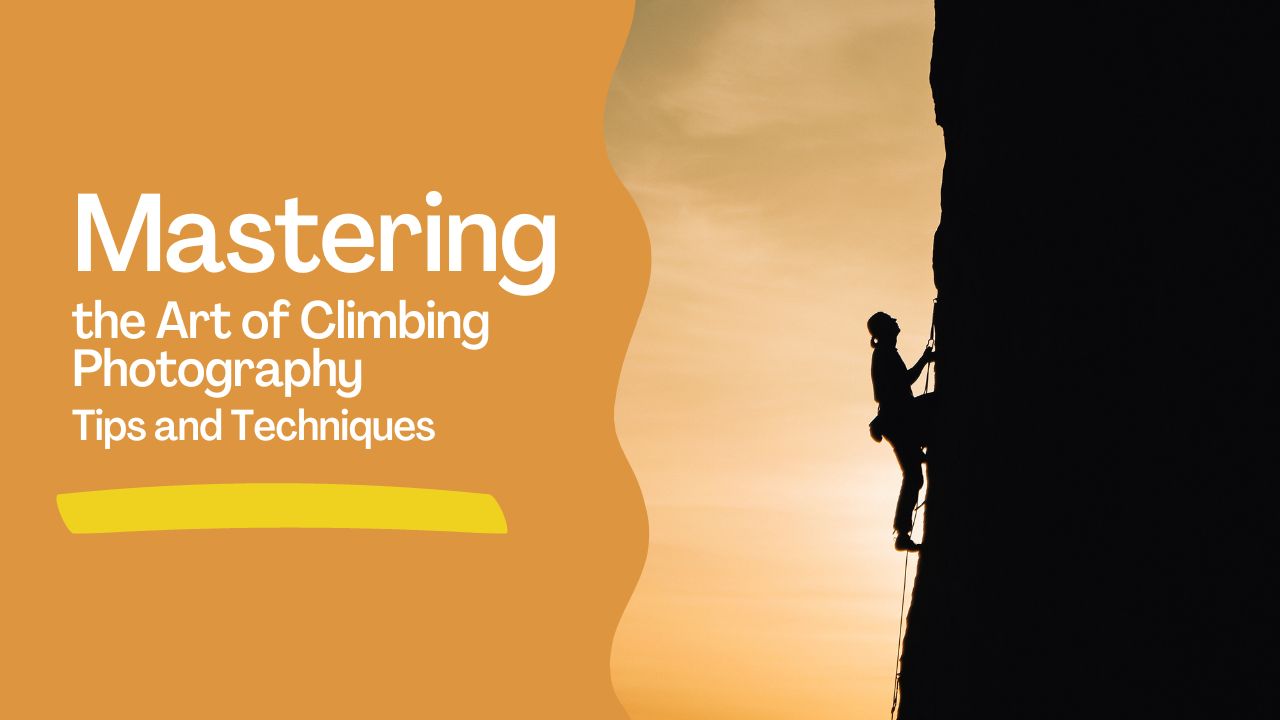
Composition is an important aspect of photography and climbing photography is no exception. To capture the movement and action of climbing, it’s important to think about how to frame the shot and where to position yourself. One technique that many climbing photographers use is to position themselves below the climber, looking up at the climb.
This can help to show the scale and verticality of the climb, while also highlighting the climber’s movement. Additionally, consider the surrounding environment and how it can be used to enhance the shot.
Lighting and weather considerations
The lighting and weather conditions can have a big impact on the final result of your climbing photos. Shooting in low light or harsh sunlight can be challenging, but with the right approach and equipment, it is possible to get great results. For example, using a polarizing filter can help to reduce glare and increase the saturation of colors.
Also, consider the weather when planning your shoot, and how it can be used to your advantage. Photographing climbing in bad weather, such as rain and fog, can create a dramatic and unique atmosphere.
Safety and ethics
Safety should always be the top priority when shooting climbing photography. It is essential to have a good understanding of the climbing environment and the risks involved. Additionally, you should always have a plan in place in case of an emergency. Additionally, it is important to consider the ethical implications of your photographs. Climbing photography can be a powerful tool for promoting the sport, but it can also be used to exploit climbers and their climbs. As a photographer, it is your responsibility to use your images in a responsible and respectful way.
Shooting from different angles
Climbing photography doesn’t have to be limited to just shooting from the ground looking up. Experiment with different angles and perspectives to create unique and interesting images. Try shooting from above, or even climbing up with the climbers to capture the view from their perspective. This can add a whole new dimension to your photos and make them stand out from the rest.
Capturing the climber’s emotions
Climbing is a physical and mental challenge, and the emotions of the climber can add a lot of depth to a climbing photo. Try to capture the climber’s expressions, whether it be the determination on their face as they reach for a hold or the relief and joy upon reaching the summit. These emotions will help to tell the story of the climb and make the photo more relatable to the viewer.
Using a tripod
Using a tripod can be a useful tool when shooting climbing photography. It allows you to keep your camera steady, especially when shooting in low light conditions or with long exposures. It also allows you to compose your shot with precision, which can be particularly useful when shooting panoramic or multi-shot compositions.
When using a tripod, it is important to make sure that it is set up on a level surface and that the camera is securely attached. It is also important to use a cable release or a self-timer to take the photo in order to avoid any camera shake. A tripod also allows you to take panoramic shots or multi-shot compositions, which is a great way to capture the grandeur of the climbing scene.
Additionally, using a tripod can also help you to keep the camera steady while the climber is on the move, allowing you to capture sharp and clear images of the climber in action. This can be particularly useful when capturing the detailed movements of the climber, such as when they are reaching for a hold or placing their feet.
Shooting in burst mode
Shooting in burst mode is a great way to capture the fast-paced action of climbing. It allows you to take multiple photos in quick succession, increasing your chances of capturing the perfect shot. It also allows you to choose the best photo from a series of shots, ensuring that you have the best possible image to work with.
To shoot in burst mode, first make sure that your camera is in continuous shooting mode or burst mode, this can usually be found in the camera’s menu or by pressing the appropriate button on your camera. Once you have your camera set to burst mode, you can begin shooting by holding down the shutter button or using a cable release. As you hold down the button or press the release, the camera will continuously take photos at a high frame rate until you release the button or release.
When shooting in burst mode, it’s important to pay attention to the lighting and composition of each shot. As the camera is taking multiple photos in quick succession, you’ll want to ensure that the lighting and composition are consistent throughout the series. Additionally, you should keep an eye on your camera’s buffer and storage capacity, as shooting in burst mode can quickly fill up your memory card.
After you’ve finished shooting in burst mode, you can go through the images and select the best ones to keep. This can be done using your camera’s built-in image review function or by transferring the images to your computer and reviewing them in your editing software. It’s also a good idea to back up your images to an external hard drive or cloud storage to ensure that you don’t lose them in case something goes wrong with your camera or memory card.
Being prepared for the unexpected
Climbing photography can be unpredictable, and it’s important to be prepared for anything. Always carry extra batteries, memory cards, and a backup camera if possible. And be ready for any weather conditions and know when the best light for photography is. Being prepared for the unexpected will help ensure that you’re able to capture the best possible photos no matter what challenges you may face.
Post-processing and editing
Post-processing and editing are essential steps in the climbing photography process. With the right editing software, it is possible to enhance your photos and make them truly shine. Techniques like color correction, cropping, and adjusting exposure can help to bring out the best in your photos. Additionally, consider how you want to present your photos, whether that be in a print or digital format, and adjust your editing accordingly.
However, editing photos can be time-consuming and requires a certain level of skill and knowledge. As a result, many photographers choose to outsource their post-processing and editing to a professional photo editing company. These companies specialize in editing and retouching photos and can help to bring out the best in your images. They can also help to save you time and allow you to focus on other aspects of your business or photography.
When outsourcing your post-processing and editing, it’s important to choose a reputable and experienced company. Look for companies that have a portfolio of work that you like and that offer the specific services you need. Additionally, make sure to communicate your specific requirements and preferences to the company, so they can understand your vision for the final product.
Sharing and promoting your photos
Once your climbing photos are captured and edited, it’s time to share them with the world. Social media platforms like Instagram and Facebook are great places to share and promote your photos, and can be a great way to build a following and connect with other climbing photographers. Additionally, consider submitting your photos to publications or contests to gain recognition and exposure. Building a portfolio of your work is also a great way to showcase your skills and attract clients or commissions.
When sharing and promoting your photos, it’s important to remember to give credit where credit is due. Always include the names of the climbers and photographers in your captions, and make sure to get permission from any individuals featured in your photos before sharing them publicly.
Conclusion
Climbing photography is a challenging and rewarding genre that requires a combination of technical skill and creativity. By following the tips and techniques outlined in this article, you can improve your skills and capture stunning climbing photos that truly capture the essence of the sport. Remember to always prioritize safety and ethics, and to take the time to properly compose, light and edit your photos. With practice and perseverance, you can master the art of climbing photography and create visually stunning images.


